Using MAPC2MAPC to create an offline map for Maverick
MAPC2MAPC will make Offline Maps for Maverick in a few easy steps. You need the map image and a calibration file (which
describes how the image relates to the Earth). If you only have a map image, then you can calibrate the map yourself see here for
how to do it or here for a simple (but possibly less accurate) way. Map images can be created by scanning paper maps or
downloaded from many places on the Internet.
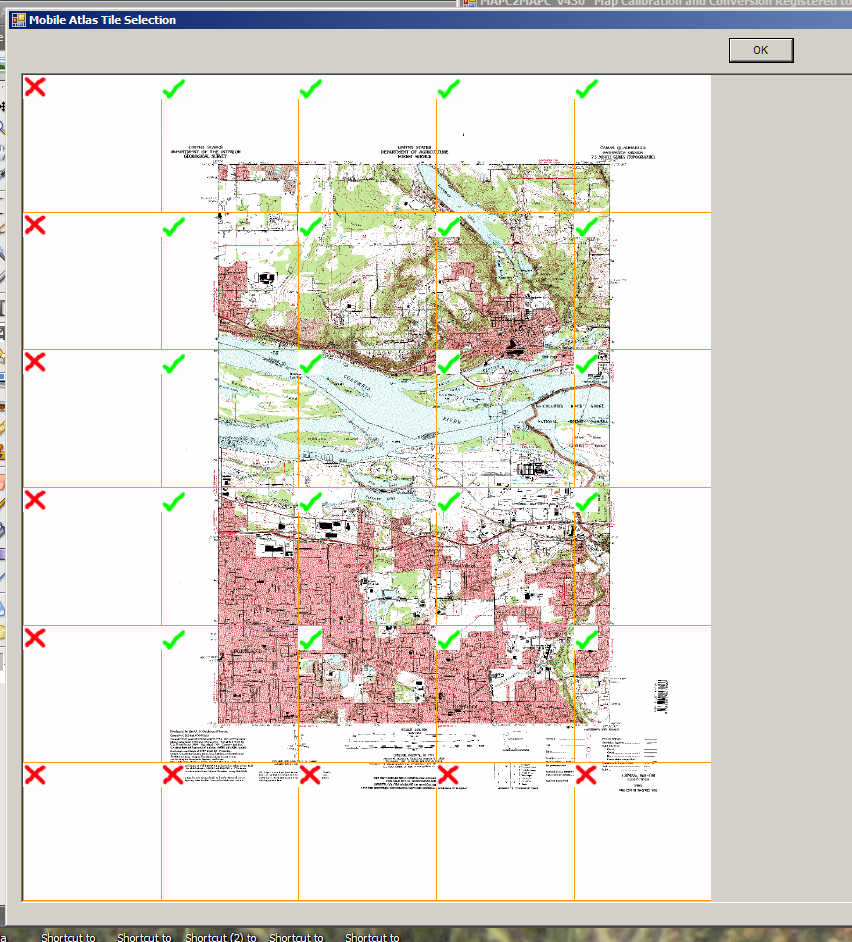
You can 'try before you buy' - the only difference with an unregistered copy is that red Xs are placed on the map.
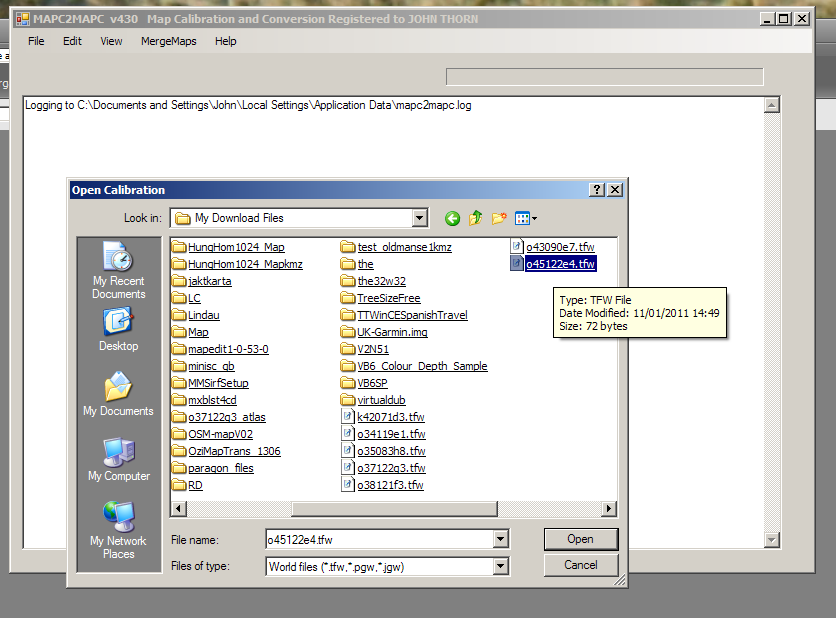
1. As an example, from Libremap.org I downloaded map 045122e4. This downloads an image TIF and a TFW calibration file.
I could equally well use an image already calibrated with Ozi Explorer
and open the .map calibration file.
2. Start MAPC2MAPC File>Open Calibration
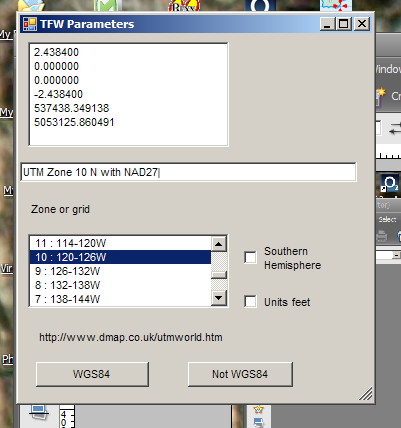
3. Because the calibration is a TFW, the program
needs more information – but extracts the TIF data as a hint. In this case UTM
zone 10 and NAD27 datum.
Choose NAD27 CONUS for the US mainland.
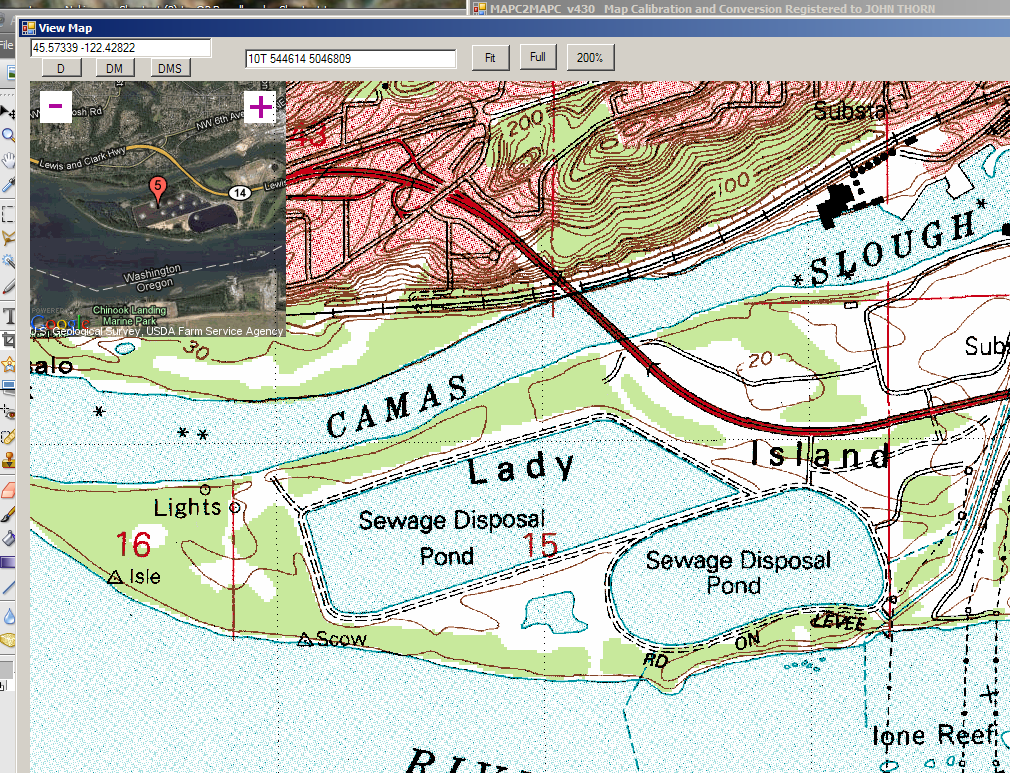
4. Once the map is loaded it can be viewed. A handy
feature is that a right-click anywhere brings up a Google Earth thumbnail (as
long as this is enabled : Edit>Preferences)
5. Select File>Write Mobile Atlas. Choose the
format (Maverick).
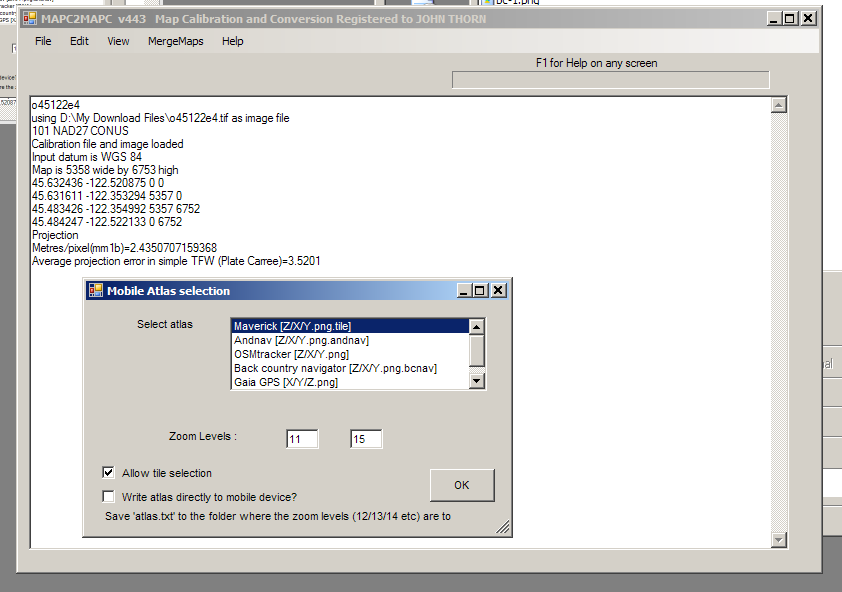
6. If ‘Allow Tile Selection’ is enabled, you can
remove unwanted pieces of the map.
7. The program runs through the selected zoom levels and puts the map tiles in a folder <filename>_Atlas
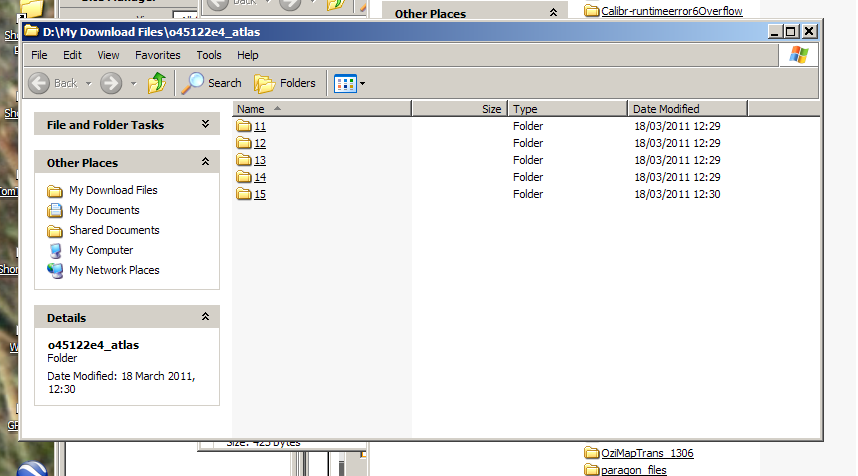
8. Copy the data from this folder to the SDCard on your Android device as
/maverick/tiles/custom 1/ (or custom 2 or custom 3)
9. Then on your Android, select Maps and Custom 1.